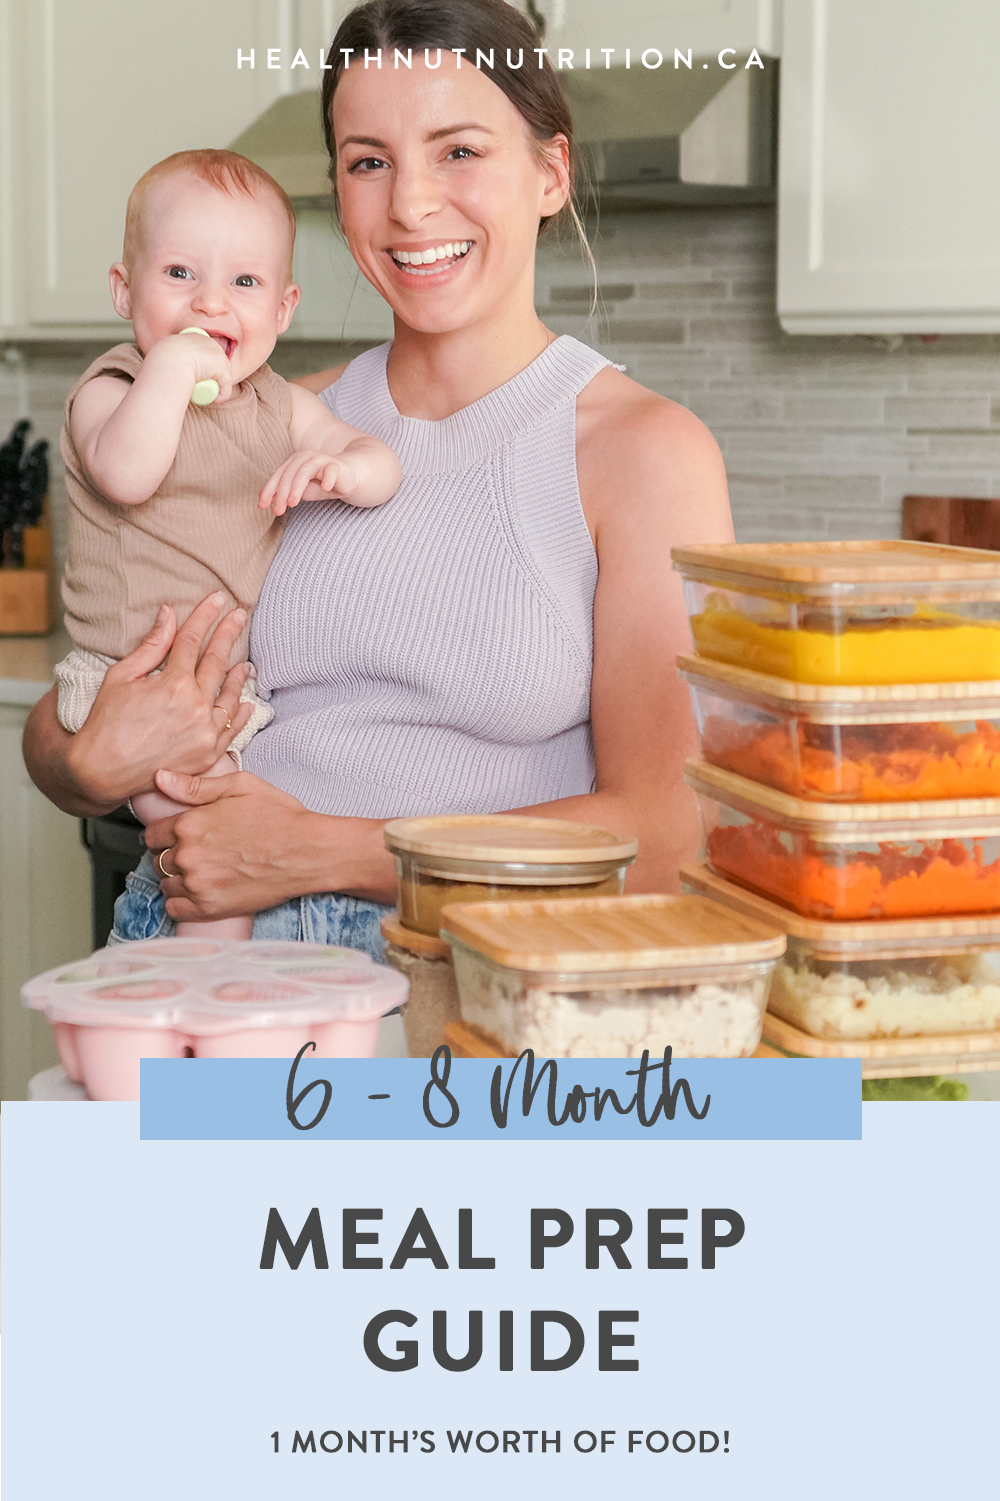
6 – 8 Month Old Meal Plan (with free download!)
A 6 – 8 month old meal plan that you can prep ahead of time to save time and money! This plan will make at least a month’s worth of food for your little one.
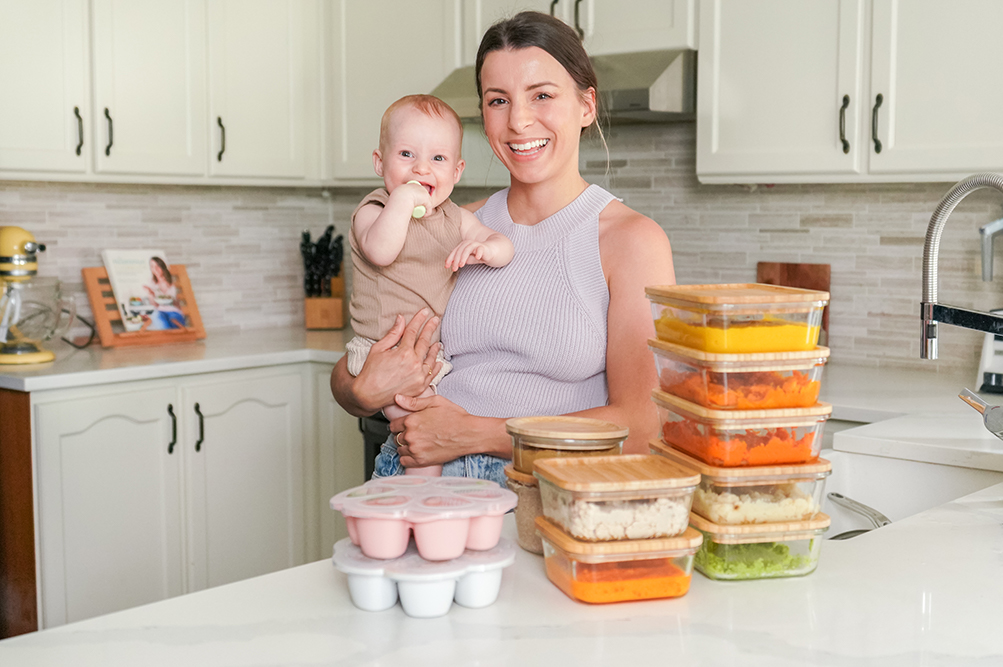
As you can probably guess from my blog and social media, I LOVE food. So you can imagine I was really excited to get Sage on board too! One of my secret weapons for feeding her has definitely been meal prep. I love meal prepping because it makes everything so much more convenient (and affordable!), and baby food is no different.
Here, I’m sharing how you can prep a month’s worth (at least) of baby food. It’ll take about half an hour to prep everything and then an hour to cook, but once you’re done you’ll have baby food ready to go for whenever you need it! And, if you’re getting ready to put together your 6 – 8 month old meal plan, be sure to grab my free download right here.

How to meal prep baby food
Depending on how far along in the introducing solids process you are, you’ll want to experiment with prepping different proteins, fruits, veggies and carbs that you can mix and match. If you’re interested in how we approached introducing new foods to Sage you can check out my Baby’s First Foods post right here. Having a variety of food types prepped means you can mix and match flavours. Remember, when creating your 6 -8 month meal plan, you don’t need to stick to ‘traditional’ foods for breakfasts, lunches and dinners. Often we’ll pair Sage’s morning oatmeal with something like carrot or sweet potato just to get those extra veggies in. She doesn’t care in the slightest!
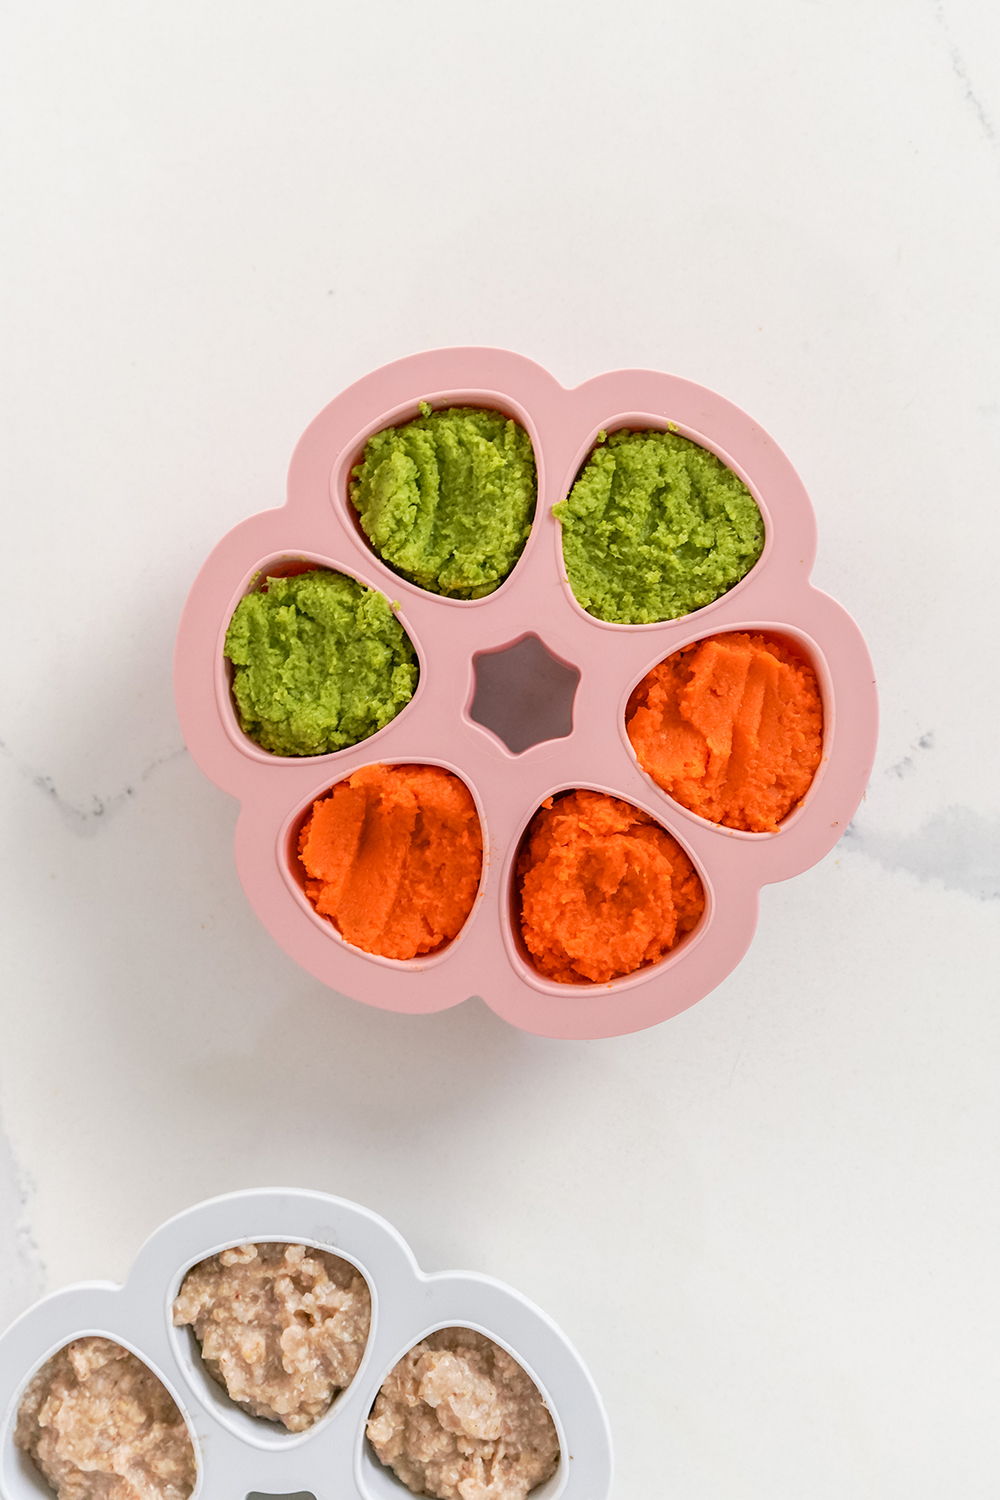
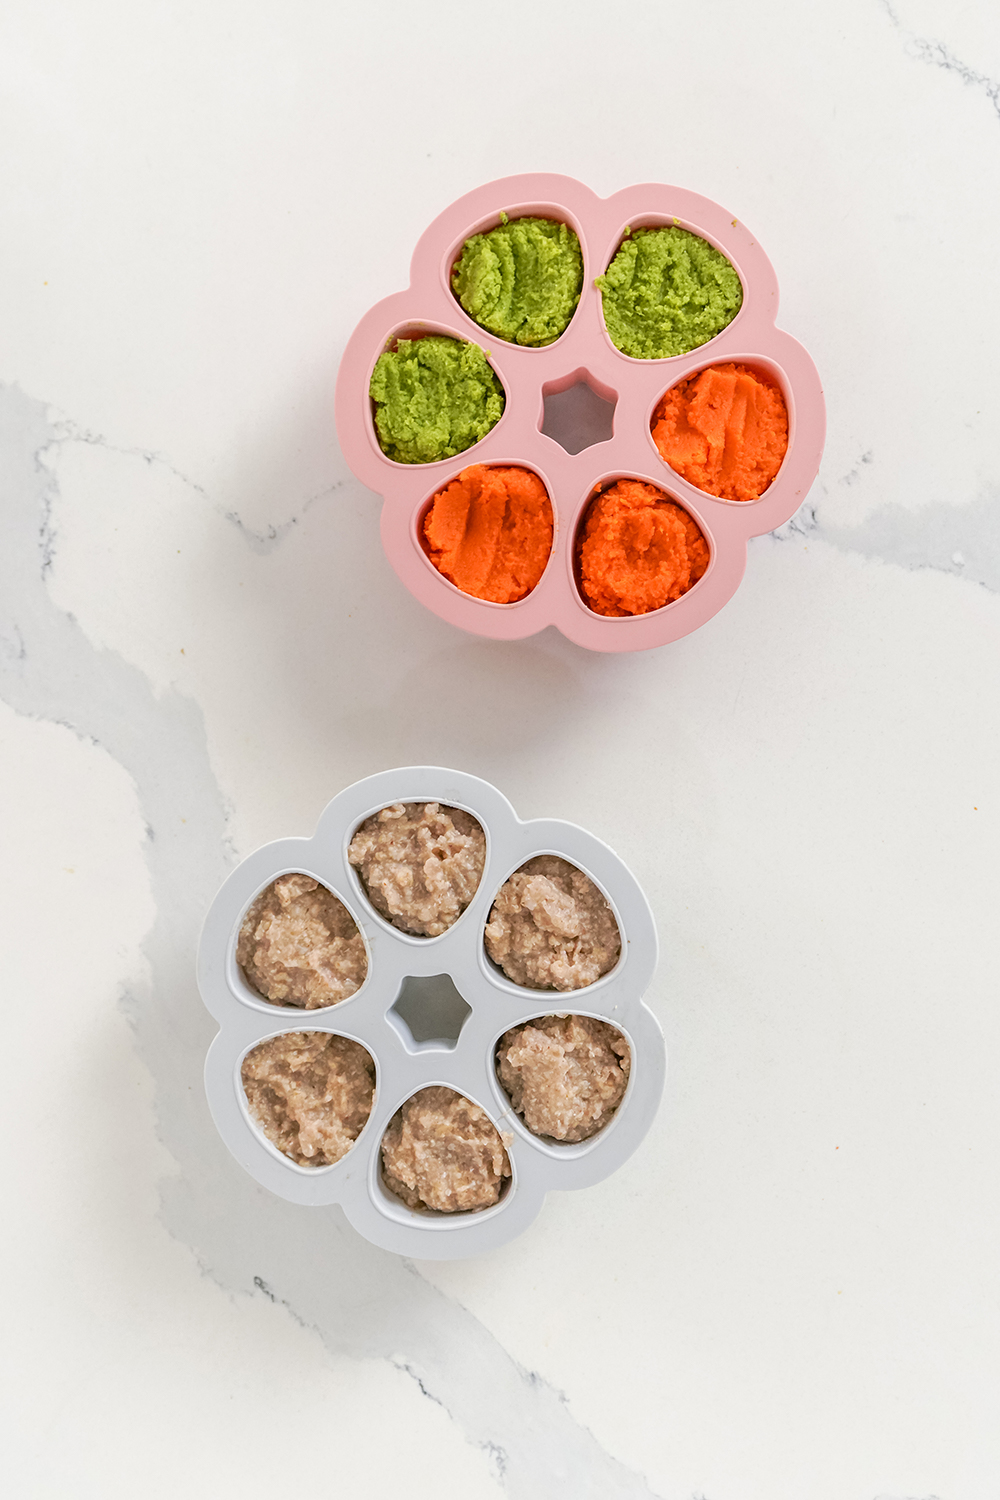
What I usually do is freeze all our baby food into these silicone moulds. They’re great because it’s super easy to pop out the food you need – hard containers would be a nightmare! If you need your moulds for making more food you can always do what I do and transfer your frozen food to these silicone storage bags. You can take a look here at the full list of baby food essentials I purchased ready for our food journey with Sage. The beauty of freezing everything ahead of time is you can just pop your chosen food into the fridge the night before to thaw. Then the next day it’s ready to be reheated. This also makes it super convenient for your partner if they’re going to be feeding your little one!
If you’re wondering where I learned all about feeding Sage, I took this amazing course (use discount code SAGEEATS for 15% off). It really helped me to feel confident in what I was doing. I’d highly recommend it if you’re also a newbie like I was or just looking for a refresher!
A note on organic baby food
For myself and Mr Matt, we tend to stick to the ‘dirty dozen’ rule when it comes to buying organic. However, I do try to opt for organic when purchasing groceries to make into baby food. The thing with baby food is a little goes a long way. With only a few groceries you’ll get so many meals (as I said, this meal prep will last you about a month if not more), so I feel like it’s worth it to spend that little extra to buy organic, local or in season. Buying frozen is great because you can often get organic food for much cheaper! Take a look here to see all the foods I love buying for Sage on a regular basis.
Should I give my baby purees?
I think there’s a lot of pressure right now to do baby led weaning because it’s ‘trendy’. But did you know that you can puree food and still have it count as baby led weaning? The point of baby led weaning is to allow your child to feed themselves, and that’s exactly what we do. We’ll puree or mash up Sage’s food and then preload her utensils that she can use to feed herself. Be warned, it’s super messy! But she loves it and has a really great relationship with food so far. Let’s hope this stays like this!
To puree Sage’s food, we use this hand blender. You can also just do it with some muscle and a fork if that’s what you have! If you’re just starting out and you’re looking for a runnier consistency, add extra water or a little breastmilk/formula as you blend. If you’re looking to make a thicker, more textured puree, just add less liquid.
Our 6 – 8 month old meal plan
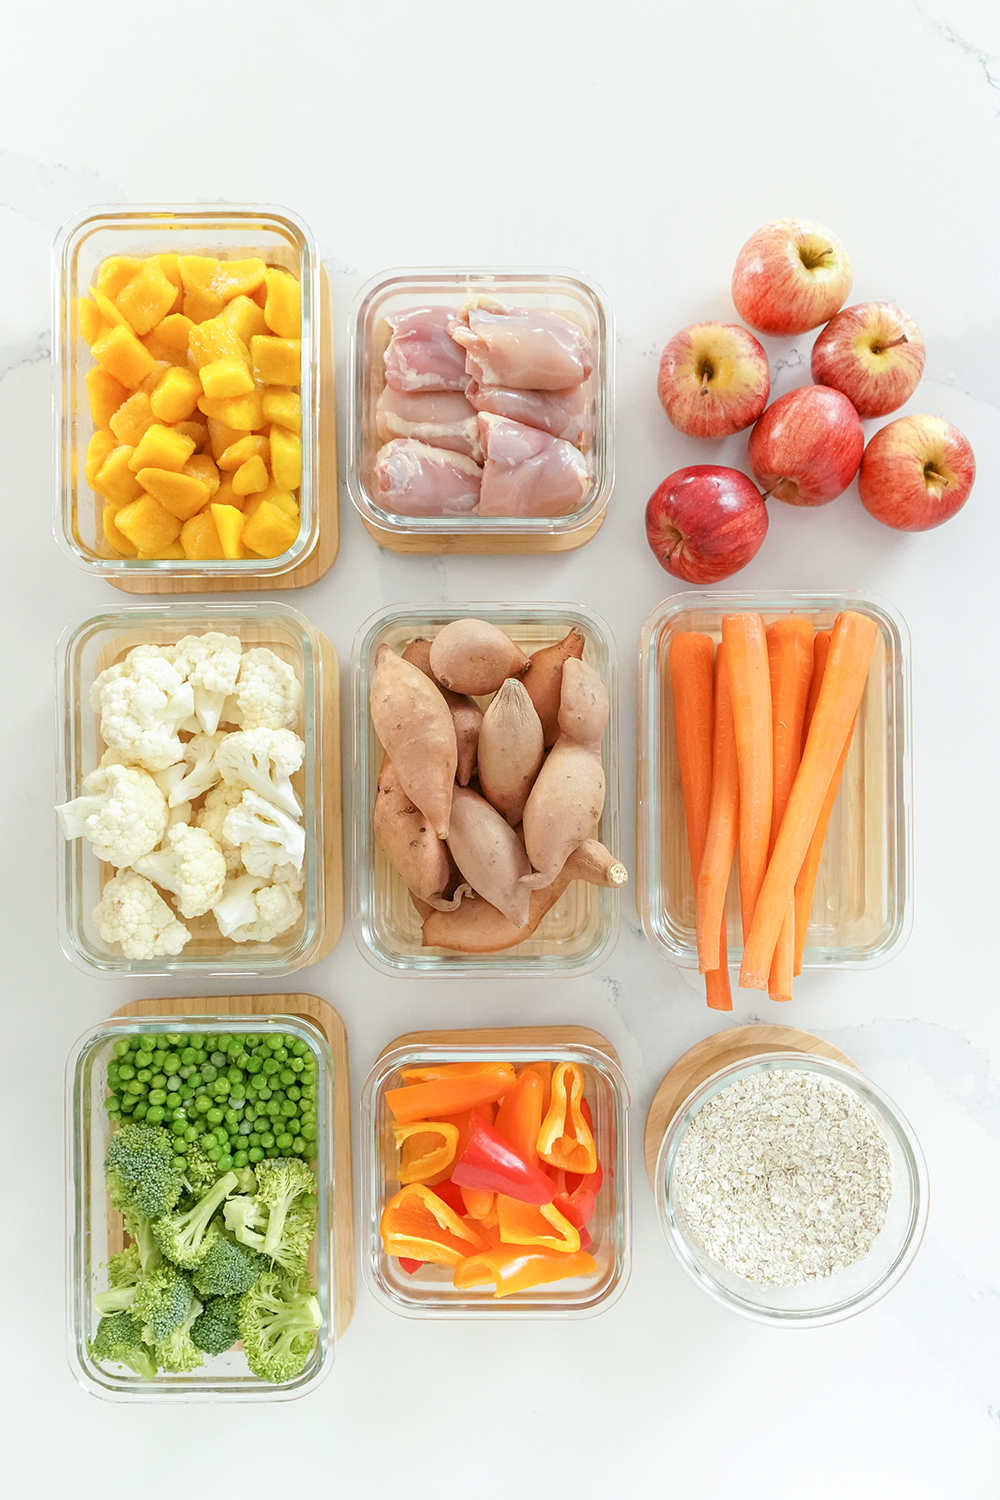
Let’s get started prepping some food! I’d recommend starting with the bits that need to be roasted since that’s what’s going to take the longest. I’d also recommend when you’re first starting out to only include one food item per frozen mould. Then as they get used to food and you know they don’t have any allergies or intolerances you can start mixing them.
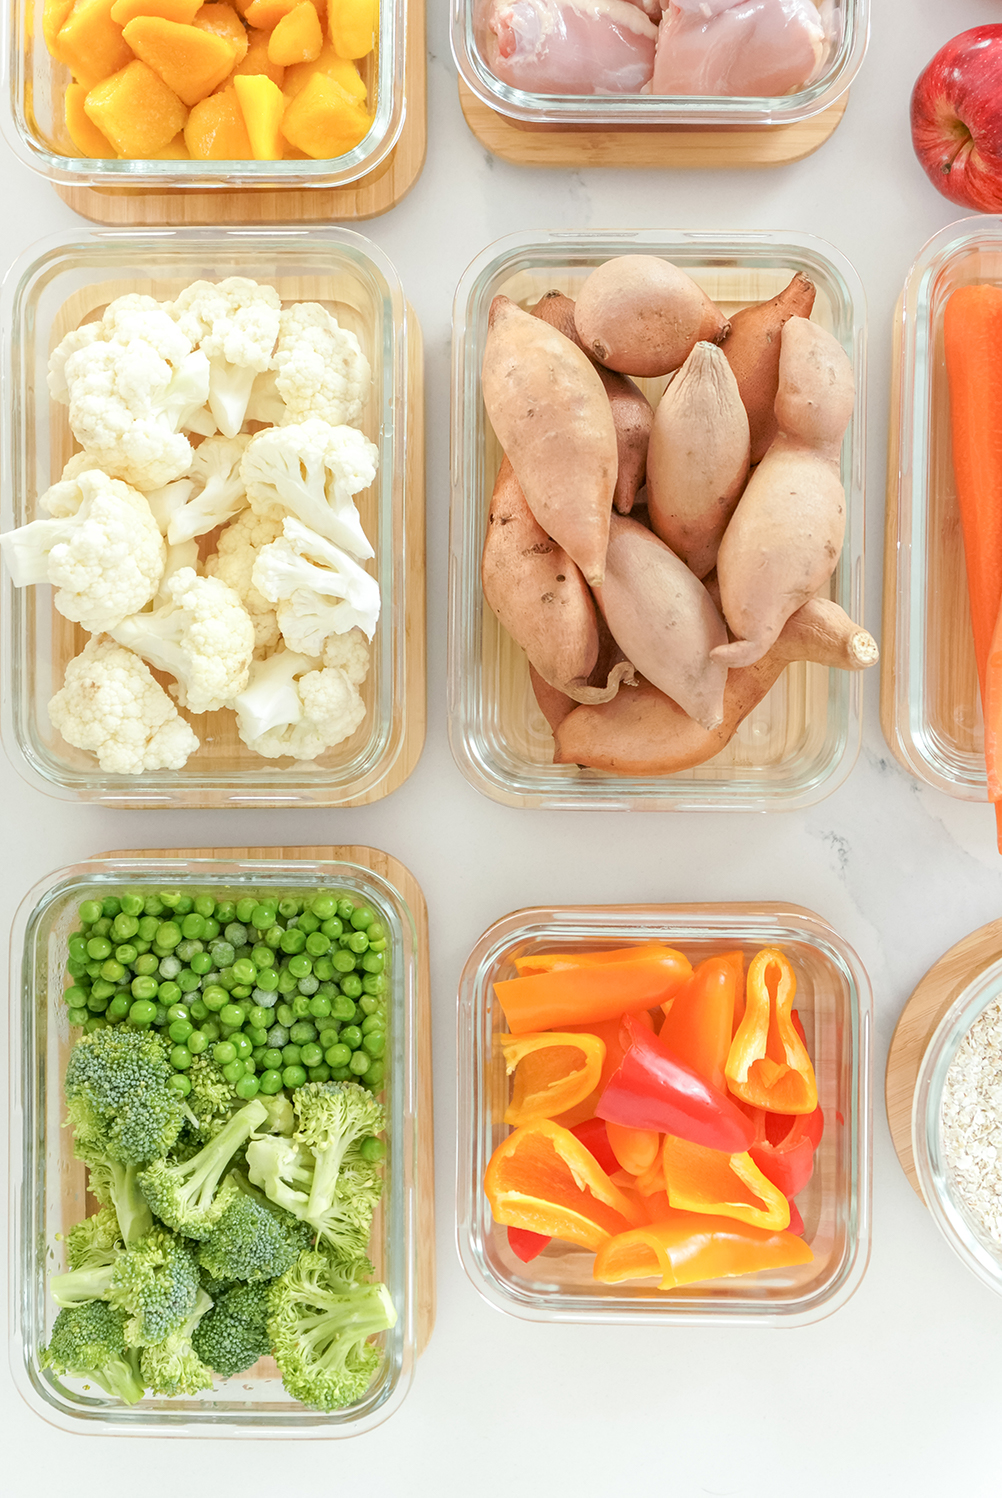
Carrots and cauliflower
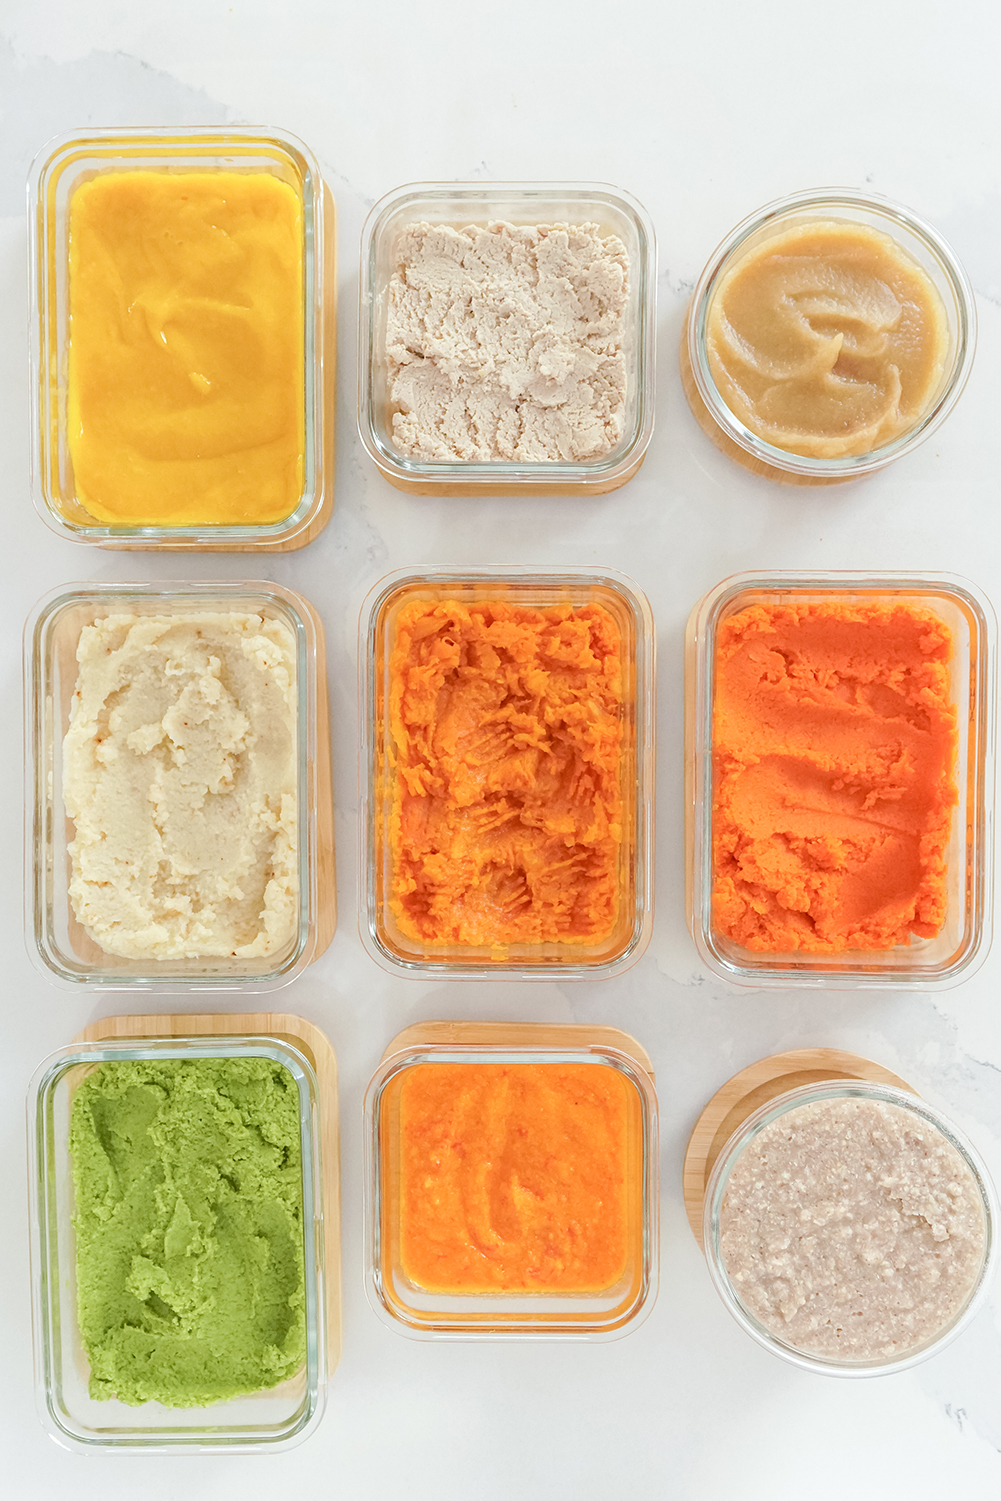
For the carrots and cauliflower I lined a baking sheet with a silicone baking mat and did what’s called ‘steam roasting’. This is where you add a little water or unsalted bone broth to the baking sheet before covering with foil and putting it in the oven. The reason for this is it amps up the flavour (which is great because you can’t add any salt to their food at this age). The steaming also helps to soften it. Steam roast your carrots and cauliflower for 50-60 minutes. Once they’re soft and have a little bit of colour, transfer to a bowl with a little liquid, blend or mash it up as required and it’s ready to go!
Sweet potatoes / yams
Next I roasted sweet potatoes by just lining another baking sheet with a silicone baking mat and pricking the potatoes with a fork. Roast your sweet potatoes / yams for 50-60 minutes, until they’re nice and soft. Then you just need to slice them open and scoop out the contents. You don’t even need to puree sweet potatoes because it’s already so soft!
Broccoli and peas
Broccoli and peas are great options for baby food because they’re getting their greens with all that lovely calcium and fibre. I like to steam my greens. This steamer insert is fantastic because it makes it super easy to pull everything out when it’s done. Steam your broccoli and peas for 15-20 minutes before blending or mashing.
Chicken
Chicken is a great protein source to start with as it’s pretty mild and easy to cook up. I like to steam my chicken using a little unsalted bone broth. I find it adds more nutrients and flavour. If I have time I’ll make my own bone broth, but let’s be honest, I’m a busy mom. Often I’ll buy it from my local health food store, make it up and home and freeze it ready for use.
I love this pan because it’s all in one and comes with a steamer basket. Add your liquid and pop the steamer inside your pot, add your chicken, cover it and steam for 15-20 minutes. I tend to opt for chicken thighs or other dark meat as opposed to white meat because it’s more nutrient dense and tends to have more moisture. Be sure to check it’s cooked all the way through and you’ve removed any fatty bits or bones before you try to blend or shred it.
Pro tip: Add the bone broth back into the bowl before blending or shredding your chicken to add those extra nutrients and flavour!
Applesauce
Fun fact, I’ve never really liked applesauce, but what I’ve discovered is it’s way tastier if you make it from home. You’ll need about 6 organic apples for this. You could leave the skin on but I find the consistency tends to be better if you peel them. Chop up your apples, add a little bit of water and some cinnamon. Cinnamon is one of my favourite spices to feed Sage as it adds a lovely warming spice and makes things taste sweeter without the added sugar. With baby food, you obviously want to keep spices pretty mellow, but have fun with them and think outside the box! Cook your apples on the stove until they get nice and soft, about 15-20 minutes. Then, as with everything else, just add a little bit of liquid and blend until it’s the consistency you want.
Pro tip: Dogs love meal prep scraps such as apple peel! If you have a dog, give your scraps to them (but be sure to not give them the apple core as it’s not good for them). The rest can obviously be used for compost.

Oatmeal
Homemade oatmeal is a great source of iron (which naturally starts depleting in babies once they hit the 6 month mark). To make our oatmeal I just ground up oats using a food processor, along with barley flakes. Then I mix it with a little breastmilk/formula and water. Warm the liquid first before whisking in your dry ingredients. In the beginning we just did ground oats, but adding the barley flakes is a nice way to switch it up as your little one grows. You can also switch it up by adding things like cinnamon or cardamom.
Pro tip: Use the same pot that you cooked the applesauce in so you get that extra bit of flavour in the oatmeal! Plus less dishes.
Mango
I use frozen mango (it’s often much cheaper, especially if you’re opting for organic and already peeled and chopped) and allow it to thaw slightly. I then transfer to a bowl and blend. If you want to spice things up and add some extra flavour, try squeezing in some fresh lime! Baby’s love sour foods surprisingly and it’s fun to see their faces scrunch up!
So there you have it – a month’s worth of homemade, nutritious baby food that you can feel good about giving to your little one. Don’t forget, if you’re creating your 6 – 8 month meal plan, to download my free printable guide right here.
Have you got any top tips for introducing solid foods? Be sure to leave them in the comments below!
If you’re preparing to start your baby on solid foods, you may also want to check out my Baby Food Resources I’ve Been Loving post and my Baby’s First Foods: What We Did.
Leave a comment
Love it thank you so very much
Hi! I came from the YouTube video to download the pdf documents of the recipes to print like you suggested and can’t find those printables. Could you help me find them?
Thank you for making these recipes! Super helpful!
Hi, I don’t see how long and and at what temp to light roast each vegetable. Also, I don’t see how long to steam after roasting. Please help!
Amazing food recipes!Thank you
Great help for a first time momma like me . Thanks a lot 🫶🏼
Love your videos & delicious healthy recipes!
You are AWESOME! Thank you for this wonderful information. I love the motherhood community. You are such a good mama!
Oh yay! This is great to hear!! Thank you!
Love the video. Thank you for the knowledge I am a great grandma and need to help my granddaughter. Loved the blender I will definitely be getting her one.
Love hearing this! Happy to have you here.
Hi! I came here after watching your video on YouTube, but I don’t see the free download link. Would you be able to put up the download link again, or point me to where I might be overlooking it? This was a great video, thank you!
Hello, it’s right under the first two paragraphs. Send me an email at [email protected] if you still don’t see it.
How to safely defrost these?? How long do they last in the freezer? Thanks again!!
Hi! You can place them in hot water to help defrost.
Thank you, it’s a great idea, we are crazy with this… and you showed easy …..
Thanks, this helped me much
Is it okay to give my 6m twins chicken? Or any meat in general or should I be waiting a little longer ?
Always ask your children’s doctor questions. I, however, would recommend waiting and trying easier foods like pureed carrots, avocados, and bananas.
What if baby has tried one ingredient out is it ok to give them the second?
For example my baby has had peas with no reaction but not broccoli. FTM and so nervous about what to give her.
Always check with your doctor. What I did is I gave one food for 2-3 days before giving another food.
Can you please share where your Tupperware is from?
What temperature to use for baking the sweet potatoes?
Where can we find the 6-9mo baby printable? It seems to have been replaced by the toddler one.
Hi. Can you help me? How do I download the guide?
Hi Christina, send our customer service an email at [email protected] they’ll be able to help.
Love from India. Very helpful. Thankyou for being there.
This is an amazing new stuff I discovered.
Thank you for these great recipes. Super excited to try for my baby. I don’t know if I keep missing it while reading though, but what Temperature do you preheat your oven to?
I was wondering about the spoons you have for baby. Do you have a link for that??
Thank you .
Hello! This all looks amazing. I’m having trouble finding the downloadable guide. Is the link still on here?
I’m from srilanka and this details helped me alot to understand new items to his plate….tha k you for this
So happy it helped!
For the oatmeal what are your measurements for the milk and water
Did you use the spoons by num num? Wondering if I should buy those.
Thanks for this! Thinking of getting your cookbook! The cover is beautiful! I would love to know how you reheated the purées for your daughter. I’ve made a lot of frozen foods and hate microwaving it. Feels like there should be a better way!
What degree should I steam roast the carrots at?
How do you suggest we warm up the cubes from frozen?
You can warm them on the stove top.
Love this!!
HOPE TO GET A SHOPPING LIST FOR MY 10 MONT OLD LOL
Hey love your posts and resources. Am from India and a first time mom to a 6 month old. Gonna start on solids this week. Was wondering if frozen food is safe for babies and wouldn’t the nutrients get lost? So conflicted and worried as I am starting work as well.
Oh yay! Very exciting time. Yes frozen food thawed is okay for babies, however fresh food is always the best.
You are great! Bravo! Thank you!
Looking for a printable meal.prep guide for babies 6-8 months old. Thanks in advance
Thank you very much for sharing, this sounds delicious for the little one! I do have one question though, how do you heat up all that frozen food then for babies meal? I thought the microwave should be avoided for babies? 🤔
Thank you so much!! This is so detailed and perfect!!
Happy you enjoyed it!
Where can I find the printable guide 🙁 it says right here but it’s not highlighted so I can click on it! I’m so happy I found you!! Ready to start this new journey with my baby 💕
Hi Nicole!
I absolutely enjoy watching your videos! I also follow you in instagram. I find your posts and stories very sincere and positive. I am starting on an instagram journey where I also want to document my motherhood lifestyle!
Thank you for all the tips and tricks 🙂
Hi from France ! Thank you so much for sharing this ! It s awesome !
Where do you buy the silicone inserts to freeze food? Really like these.
Thanks, this was really informative